Showing posts with label Scenery. Show all posts

Monday, 24 October 2016

Mantic plastic pipe terrain for Gorkamorka / This is not a Test

A while back I managed to get hold of some of the plastic mantic pipework that was part of the deadzone 2nd edition kickstarter.

This has been sitting a box for a while as most of my kickstarter stuff does, and had a "good idea" to use the pipework for some terrain for the gorkamorka campaign and the incoming this is not a test kickstarter that is due to hit the uk shores at some point.

so after some pondering and general faffing about as well as asking the masses on the terrain tutor's facebook page, It wasn't long before I'd assembled the following and was waiting for the PVA to dry! 


as I was using this for both personal, club and potentially demo terrain I wanted to keep it fairly simple so a quick blast of army painter red spray followed by the classic sponge technique straight over the top for the weathering, Once that was done it was a simple task of painting the bases and that was it really! 


some ork bikers for scale/size wise


and close ups of the various bits, to raise the pipes off the floor I used the connectors that you would normally use to connect to the side of buildings and put a bit plastic card to make it level to the height of the bend.


An open gangway for snipers and the like assuming you want to stick out like a sore thumb! 


this one doesn't have a ladder as I forgot to stick it on, so technically the walkway is inaccessible. However its no biggie really. 


I've already used this terrain in a few games and they work a treat, Not sure if I'll do any more as this is plenty for a 4x4.

Wednesday, 27 January 2016

Panzerfaúst - The Snail breading shed,

I popped over to Rob's mid -December to drop off the snail house that I did and was handed the snail shed,

once again designed and built by the same chap who did the previous buildings, the detail on the model is superb and really well cast! 


I also got a set of the walls as well, previously when Rob mentioned that he'd sorted out a set of walls I wasn't overly bothered until I actually saw them and the snail shells within the brick work was brilliant! 


It took me a while to decide on how to paint the shed as I wanted it to look different from the previous buildings that I've done and after a but of a brain storming session with the guys and girls on the Panzerfaust facebook page of of the ladies suggested a mixed brick look so rather than thinking about it too much I just went for it!  


So after the initial colours were put down I gave it a wash and then a really light dry brush to bring the colours together, then it was onto the walls, I started off with a grey and after some feedback from a few different individuals I copied the shed multi brick effect onto the walls,


such a massive difference and looks so much better! 


so that's the terrain for panzerfaust all done so far so as and when Rob decided to commission more hopefully I'll get the chance to splash some paint on his terrain, I've been getting good feedback so it's good to know that I hit the nail on the head for the over all look!

Thursday, 24 December 2015

Panzerfaúst More terrain!

After I did the last lot of buildings that I did for Rob, It's been fairly quite on the panzerfaust front for me as I've been distracted with various other bits and bobs,

However Lee swanned into the club a couple of weeks ago and gave me something quite "special"


its a snail house! As soon as I saw this I was "ooohhhhh" with the excitement of how cool it is then I was "ooohhhhh" with how the bloody hell was I gonna paint this!

So I started with a blast of grey primer, This is now my go to primer colour, black was used for years and after a tip from Adam. well worth a try,


applied some basic colours after much discussion with Rob with the look that he was going for 


part way through the basing, 


and with the PVA still drying, it was done and dusted! 


really nice detail on the model, really simple to paint and takes washes and dry brush really well.


For some reason painting the snail house unleashed the inner terrain maker and I decided that I wanted to make some scatter type terrain for the village that was growing,

I started off with a washing line and well,


after some feedback from the guys and girls on the terrain tutor facebook page, the next line that I make will be baby wipes cloth rather than tissue paper.  The well came from dungeon saga, I had doubles of the terrain pieces so figured it was going to a good cause!

And in the usual Anton manner it kept snowballing....

I picked these up from a bargain bucket at gifts and used some of the army painter barbed wire and these were done in record time, just need to put some flock on this lot,


and it didn't stop there...

after getting some fences from rendrea I threw this lot together in a rapid turn around! 


lots of fences for various layouts


and the finished field, really happy how this has come out and as I've donated this to Rob for the greater good I "might" do another one for myself, 


So earlier this week I nipped the snail house, fences and veg patch over to Rob and I was asked to do some more bits for him which I jumped at the chance, and these were handed over...

So I've a snail breeding house to slap some paint on,


rather than simply painting it, I've posted on the Panzerfaust facebook page to see how the masses would paint it, and once I've a few selections then the one with the most votes will be chosen with Rob's blessing of course! 


and the walls that will be released as well, note the  snail shells within the wall which is a nice touch!


I did also get some other "bits" but these will follow in a later post before the end of the year ;)

Friday, 23 October 2015

Panzerfaust terrain painting guide - Mushrooms & houses!

When I was over at the Derby show earlier this month I was asked by Rob if I could some terrain for Panzerfaust and gladly agreed,

I was given a bag full of mushrooms and four buildings to sort out and thought I'd do a "how to" as I was going to try and paint these without the use of an airbrush unlike my last lot of mushroom terrain.

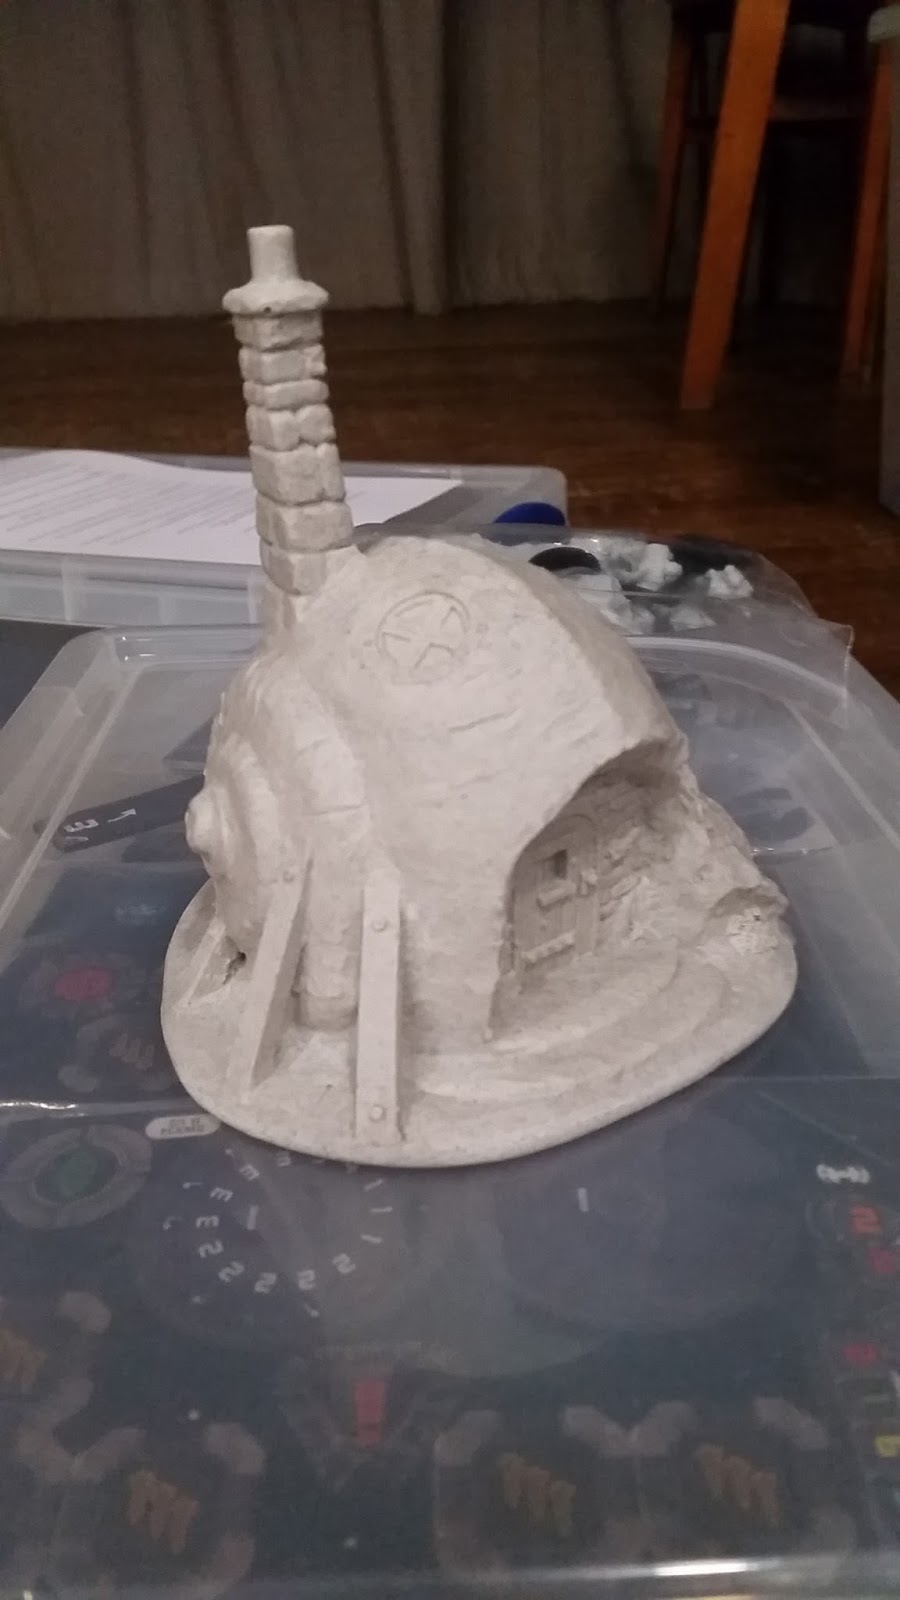
So the raw materials that I was handed...


These are test casts of the buildings that will be up and the right hand one is unlocked at 25K,


a ton of bits via fenris models, lovely to work with.


So I washed the resin and stuck them onto 50mm bases, the inserts are from warbases that I've used before, really useful as you can have a variety of terrain that you can swap out buy simply buying 50mm bases and sticking what ever you like on them just base them the same!


I had some ebay specials turn up as well and will fit in nicely and give it a bit of variation!


So onto the guide to painting a ton of mushrooms with minimum effort!

I started off with a grey car primer that I get from halfords, I use this as my go to primer after a suggestion from Adam on mountain of metal painting studio


I then gave it a quick coat of army painted bone, now the trick to this is not to "undercoat" but to dust coat it building up the layers, so that the spray hits the model in a direction that keeps the grey in the shadows.


I then did a light coat of white, then got some blu-tac made these into balls and simply stuck them on the mushroom, remembering that where the blu-tac is placed will be where the while will remain, I'm sure you could use round stickers if you wanted smaller spots.


I then sprayed with army painter red from the top of the mushroom so that I don't get too mush over spray on the stalks


then its just a case of simply removing the blu-tac and adding the detail, I did this by painting the spores and cracks with a off while and then simply doing a green wash,


however at this point I hadn't given the stalks a soft army painter wash,


so a couple of hours work of work and they were sorted, Rob was happy with them so all is good!


It was then onto the houses that I'd been asked to do, I started with a grey undercoat, then a bone covering for the base coat of the plaster


I started with sponge painting the big surfaces them grabbed a cheap brush and stippled and dry brushed the walls,


Then it was onto the details and start making it look weird and pretty at the same time!


Isla well being Isla wanted to get involved as well and I gave her the bases for the mushrooms to keep her amused!


So after a bit if a hardcore session I managed to to get the buildings to a reasonable tabletop standard, The way that I did the white spots on the mushroom roofs was I cut a three different circles int a bit of paper and simply sponged the area then once it was dry gave it a touch up with a normal brush and it was sorted! 


So with some basing done I simply had to wait for them to dry and I could deliver them!


overall the building are really nice, solid resin so gamer proof however no idea on the price point as it currently stands.


I'd told Rob that he was 9 stands short of the bases that he'd given me so I got these on the when I arrived,


so exactly the same based up and all that jazz, however I was going to simply matt varnish seal them give a soft wash and then simply base, however Rob wanted me to do the same as the previous batch so it was a rinse and repeat,


the only thing that I did differently was I used frog tape Frog tape to cover up the stalks as the red would be going all over the place.


And that's it nice and simple, the masking and blu-tac takes a little while but the finished result is well worth it.

The golden question is what other colours would you think would look good?