So way back last year the Prodos guys approached the Phat cats demo team about doing the AVP board for 2015, so it took us about a millisecond to agree to this and whilst we were cool and collected on the outside we were...

on the inside!!
Initially we were told that we'd get the models so we could start working on the board is due course, however due to a delay in getting the models out to us it was looking tight with regards to actually getting the board complete so it was time for plan B and after a quick chat with Rob at the Hammerhead show at the end of Feb the wheels were set in motion for a Aztec type pyramid,
So after sourcing some foam via Dan at the club it was time to crack on and sort this bad boy out!
I'd already thought ahead and ordered a hot wire cutter as I didn't fancy taking the bread knife to the foam as it would have taken ages and if I didn't cut it right would have looked naff!
So 35 quid later I had a new toy!
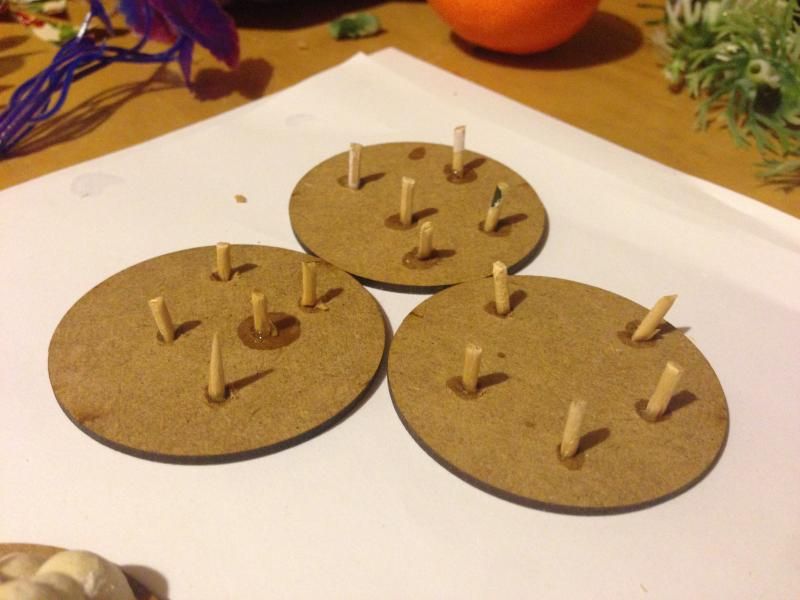
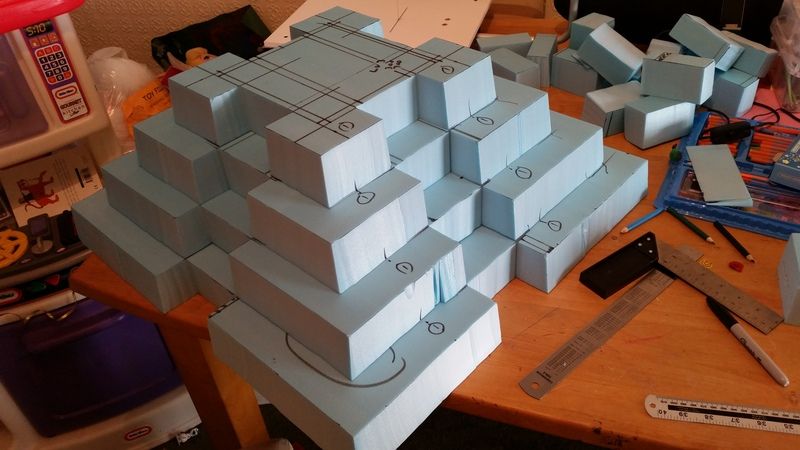
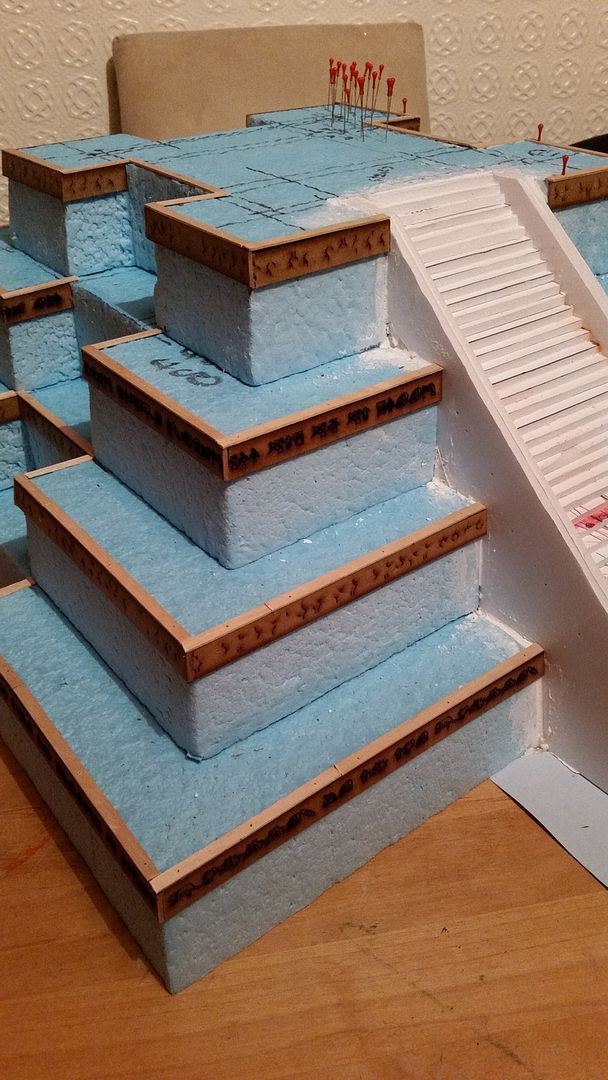
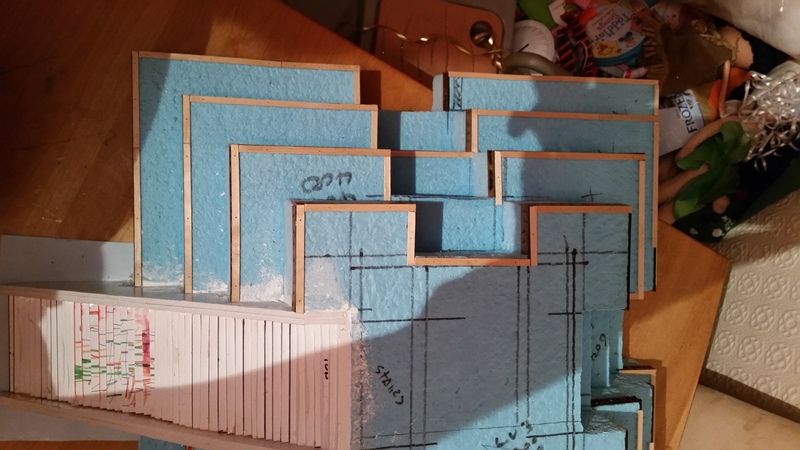
I started off with measuring out the foam ready for cutting,

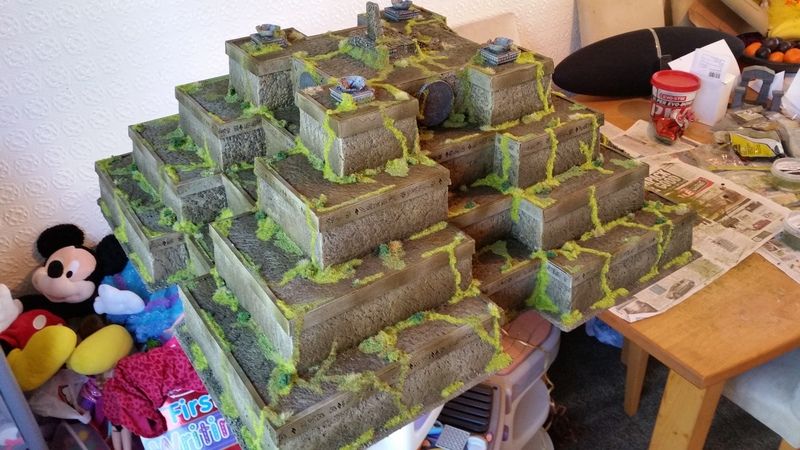
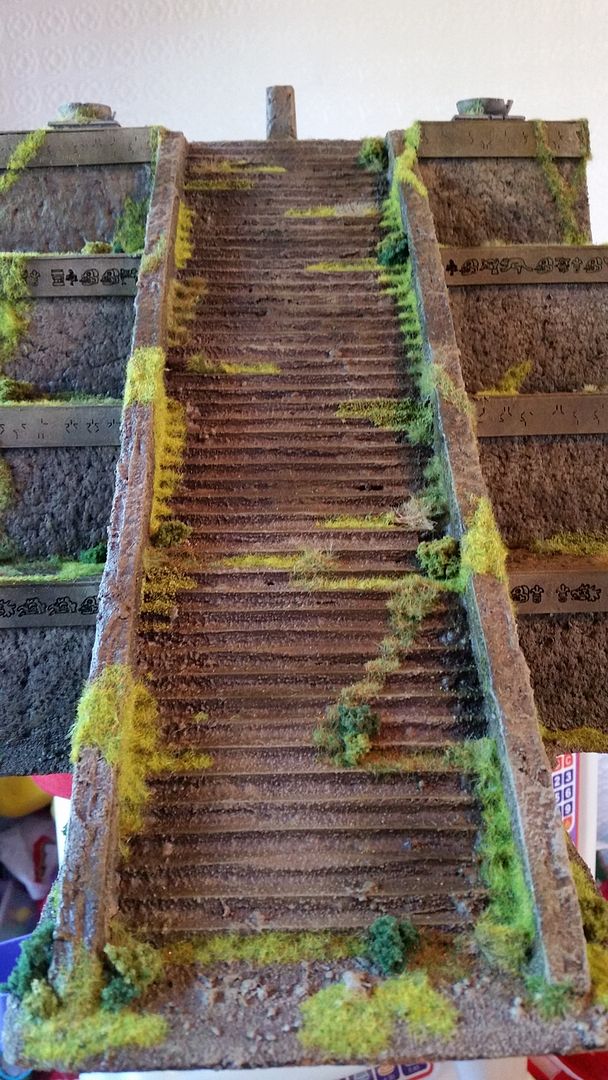
the bottom layer would be 600mmx600mm with the next level being 50mm smaller on all sides and stepping up until I had four tiers including the base,
rather than having a straight edge I wanted to give it a slight taper so I went 10mm in from the edge and simply angled the hot wire cutter so that the bottom and top of the foam was lined up and cut away the wedge.
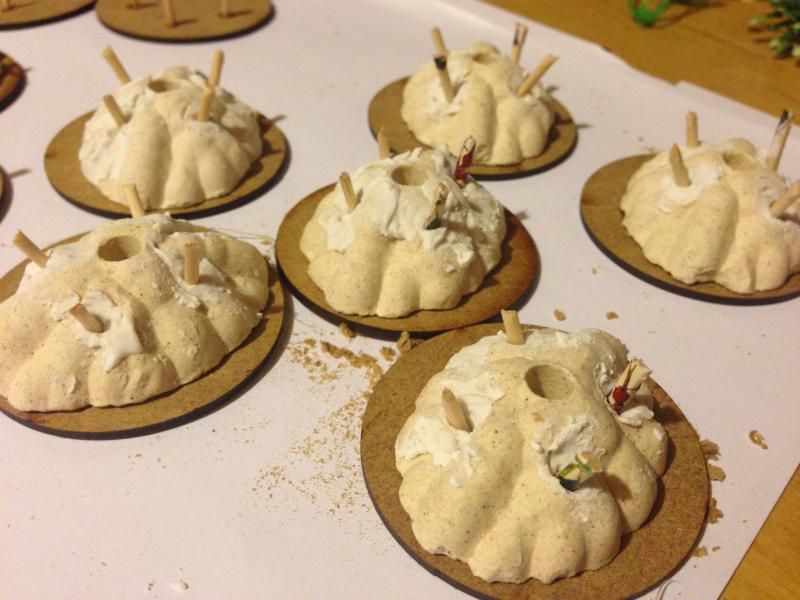
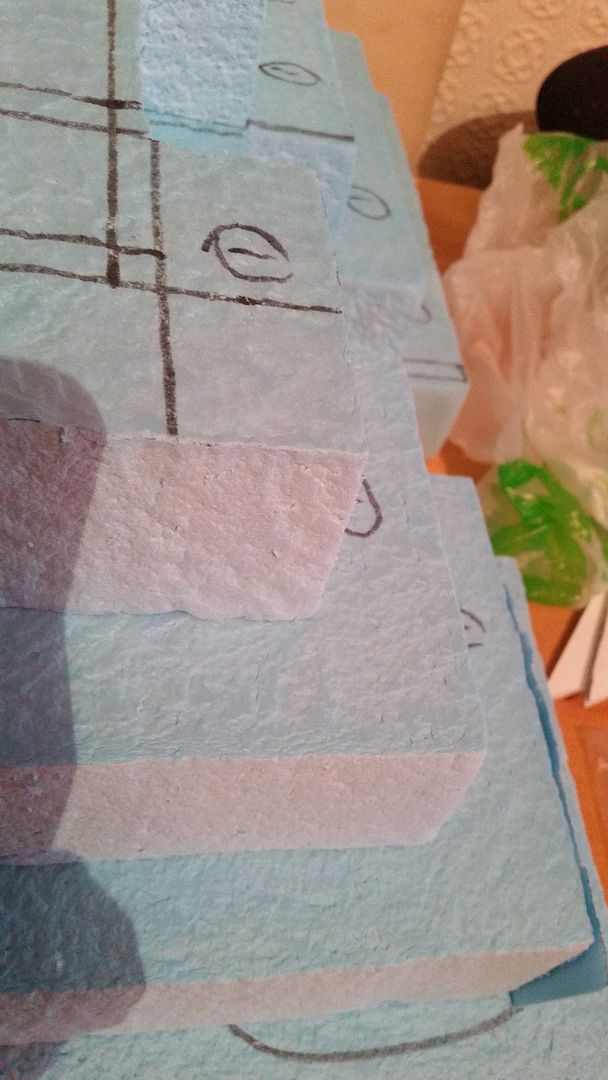
At this point I'd been doing so digging around on you tube for various ideas and discovered that Mel the Terrain Tutor had done quite a few vids on working with foam one of them being doing a dry stone type wall effect, Now I wasn't going for this effect but when Mel used a normal stone to imprint the foam with the light bulb went off and I wandered into the garden with Isla and found a few stones that looked promising, however it soon became apparent at the current rate I was managing to mottle the foam it'd take me about 3 weeks! So back to the garden I went and found a piece of broken concrete slab and went for it with that.

and a couple of hours later I had managed the whole lot,
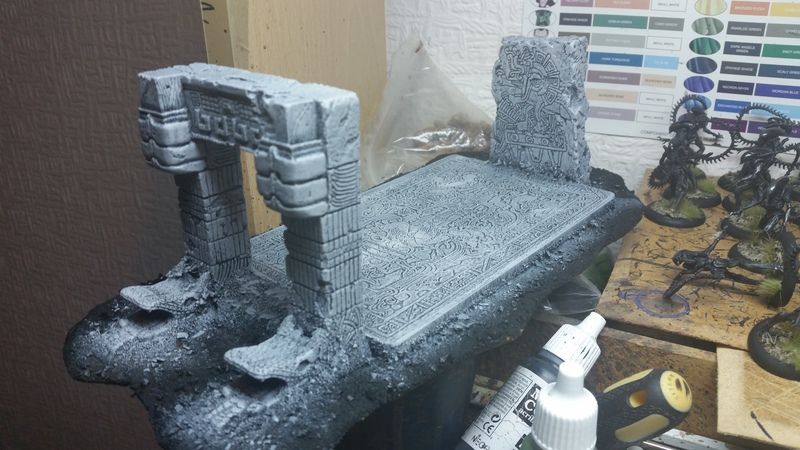
I'd been talking to a few guys with what I could do to "spice" up the pyramid and a lip running around the edge was suggested which I thought was a cracking idea, however in my usual "Anton" mode I decided to take it to the next level and see if I could get some laser etching sorted out, and I tapped up warbases war-bases.co.uk and after a quick email chit chat they were sending me the bits that I ordered,
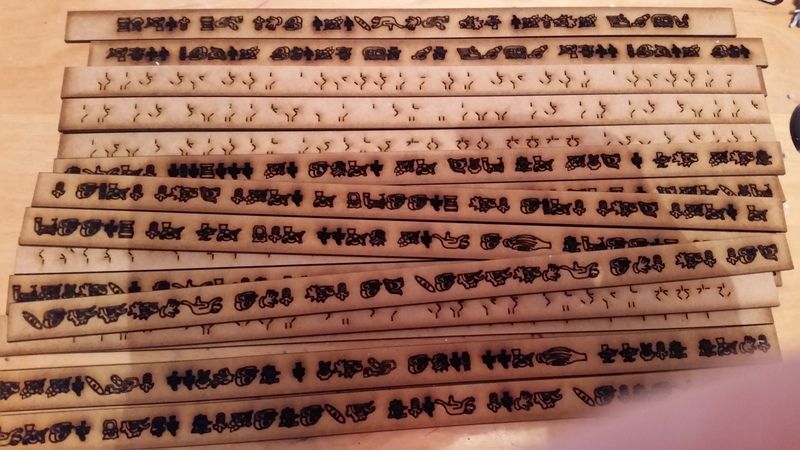
All I needed to do was provide the fonts that I wanted to use and the wording, so with some dry fitting so I could work out how they would look I was well chuffed with them and went to town on it,
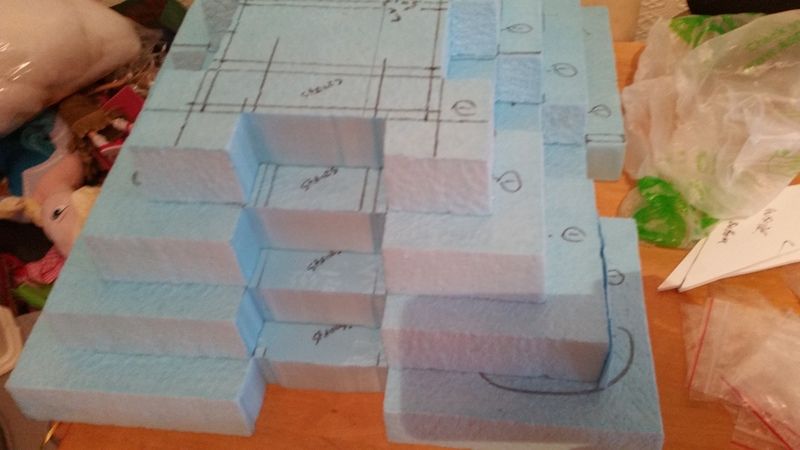
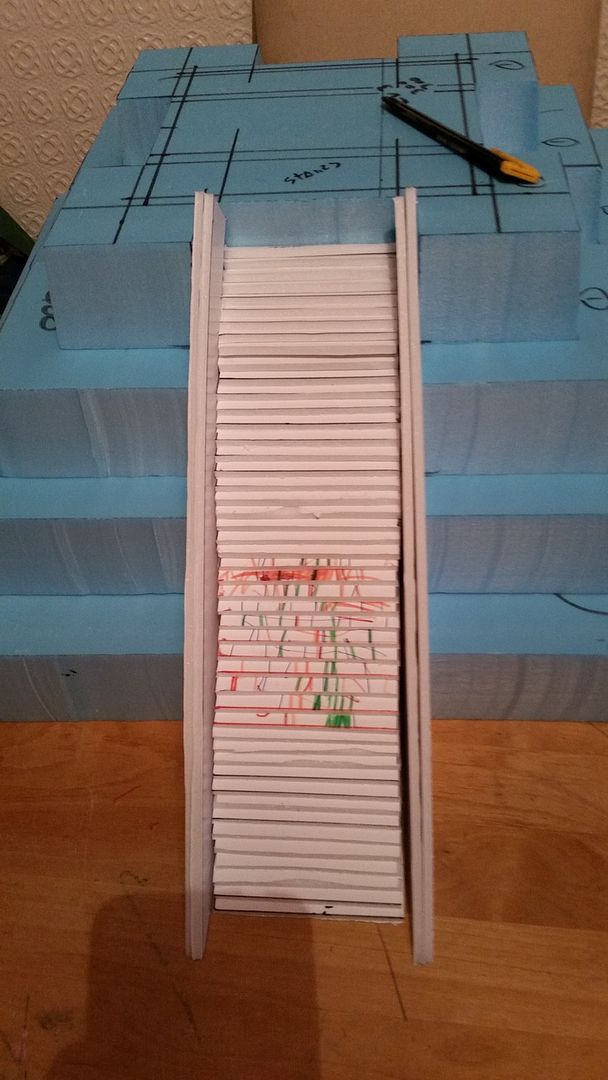
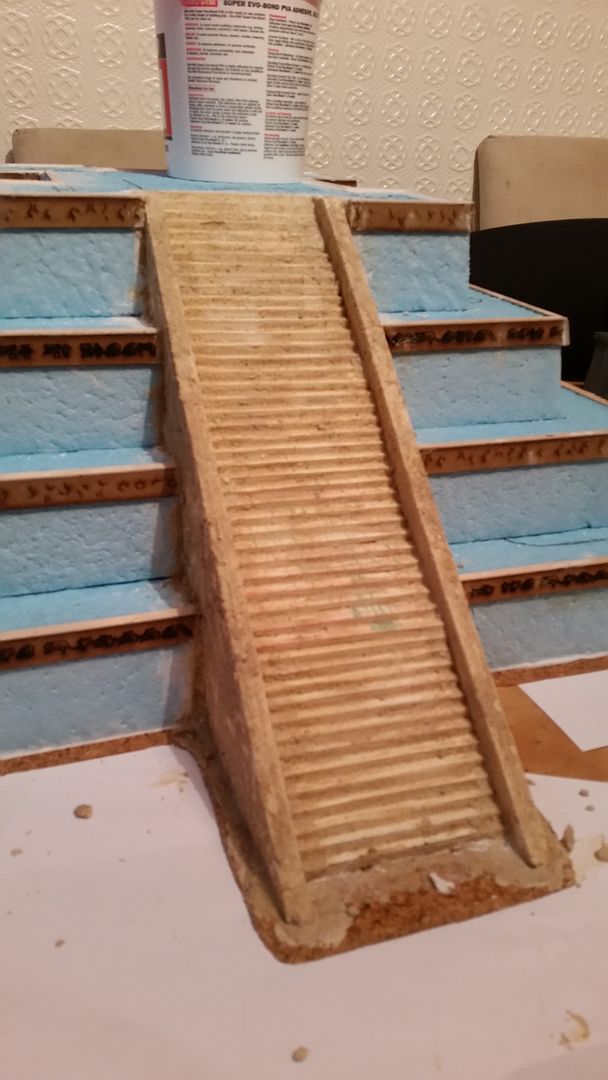
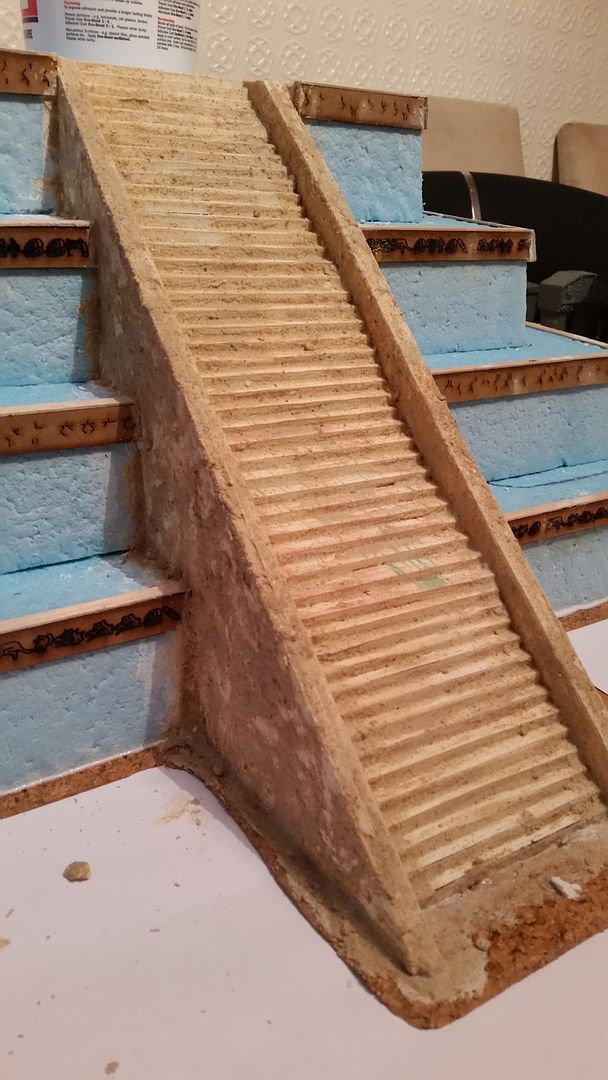
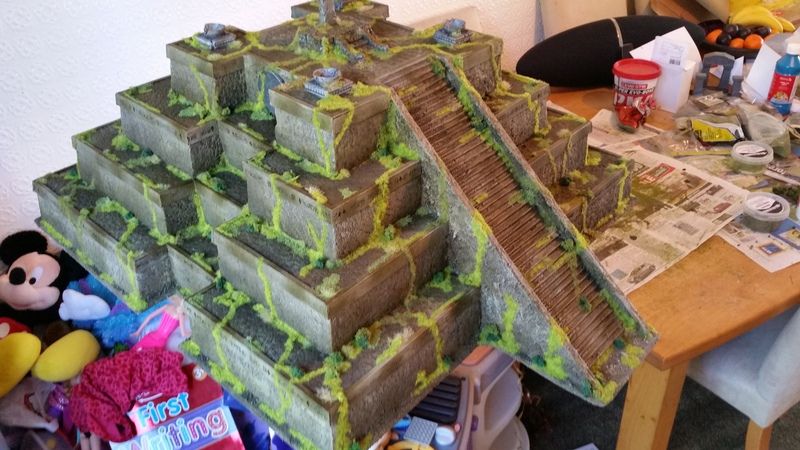
However I did then realise I really needed to sort out the stairs before attaching the MDF strips,
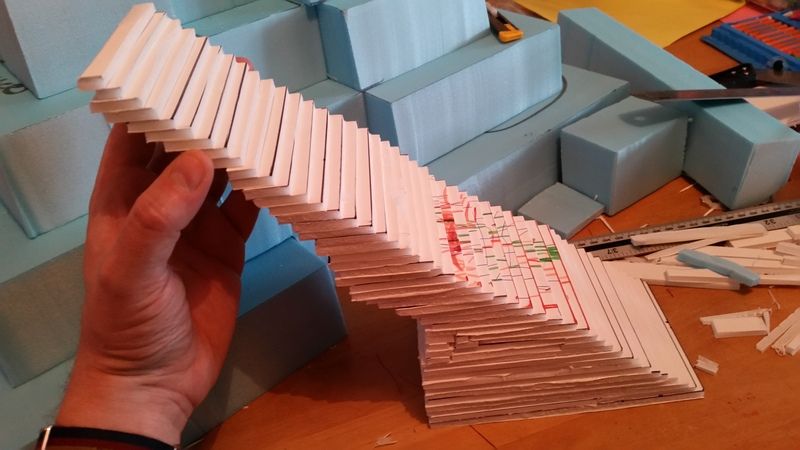
So lots of cutting and sticking the basic stairs were done, I simply used one of Isla's pitt stick to stick the lot together and it dried really quick no issues,

I was in two minds with regards to putting side panels on the stairs and after a quick discussion on the Terrain Tutors Terrainaics page the masses had spoken and I added the sides on, but decided to double skin them to give a bit more of a solid look,
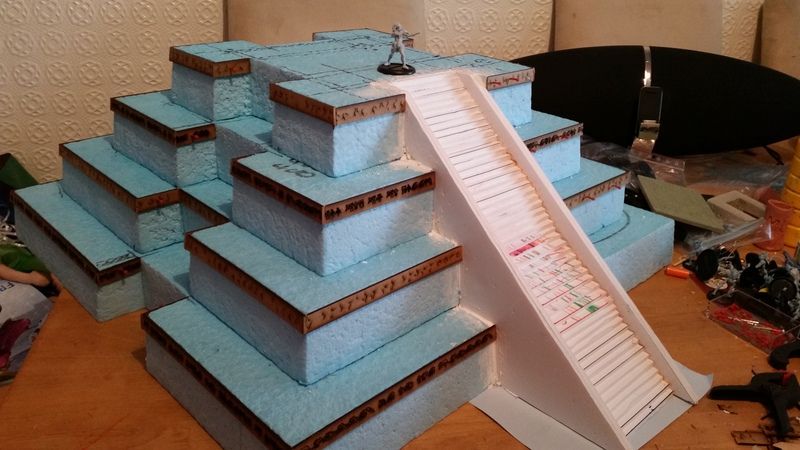
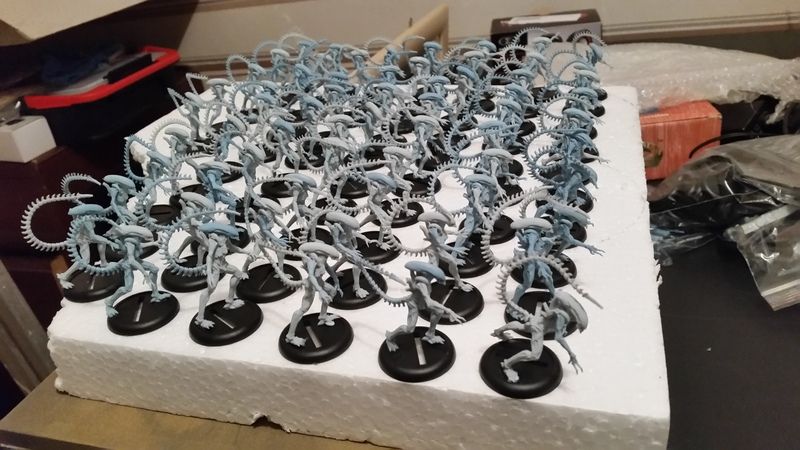
However the build got slightly sidelined with the arrival of the models!
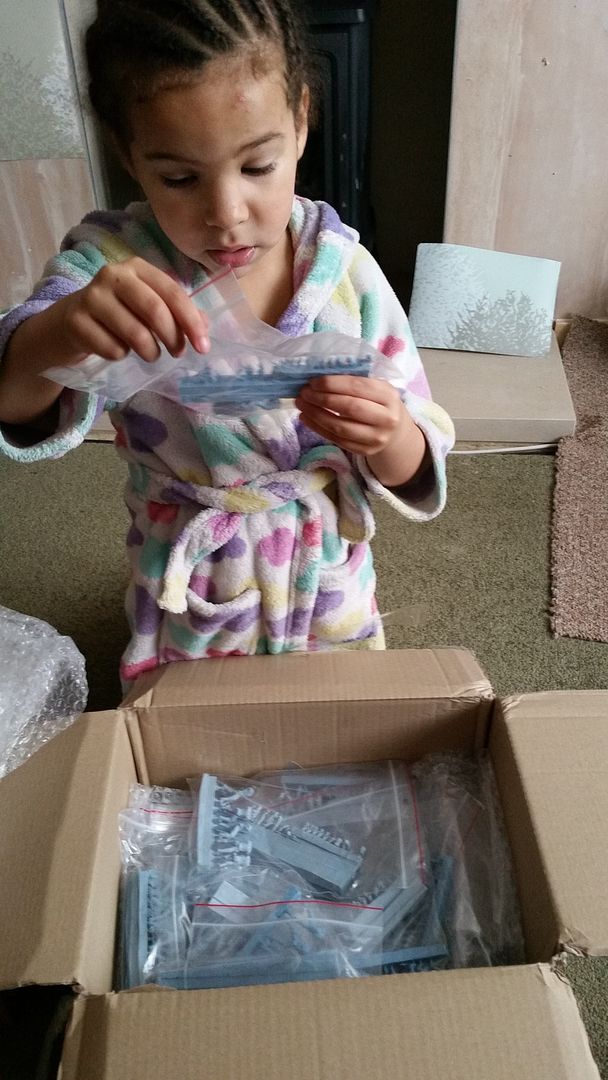
after my quality control department had given a sample batch a check over I started on building the models that had rocked up.
And after a bit of a refocus thanks to Salma I carried on with the pyramid,
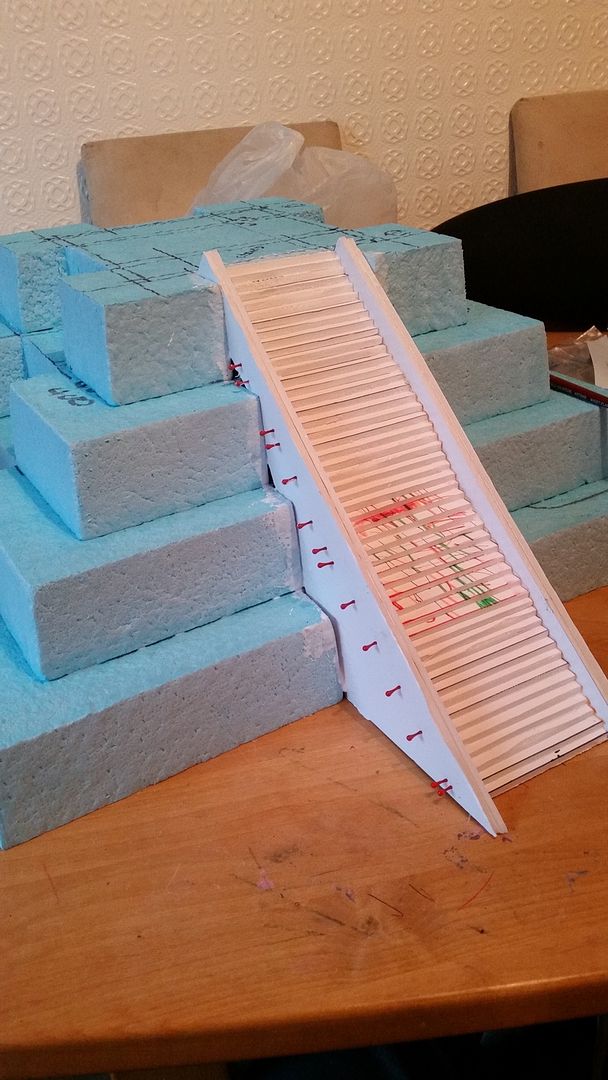
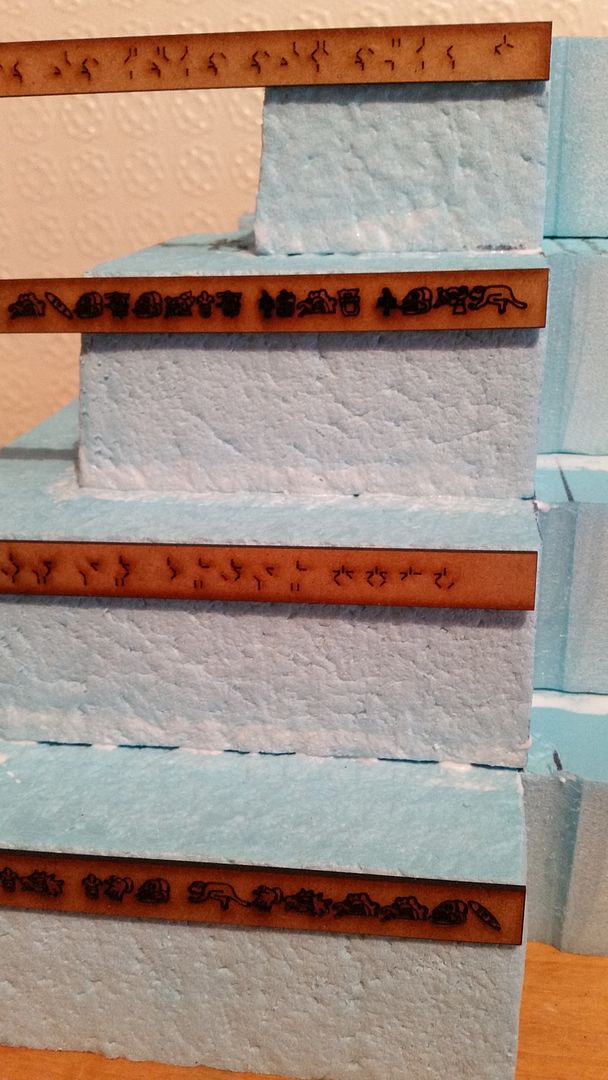
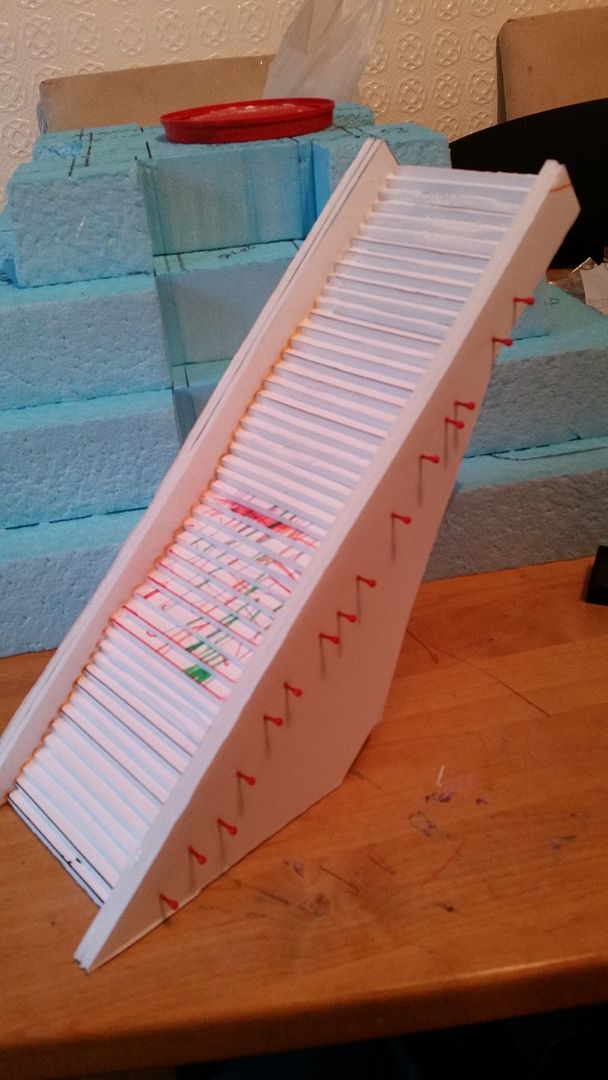
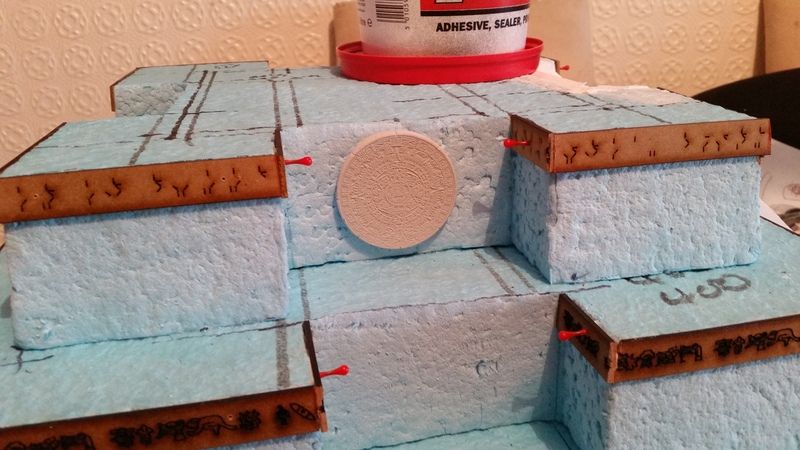
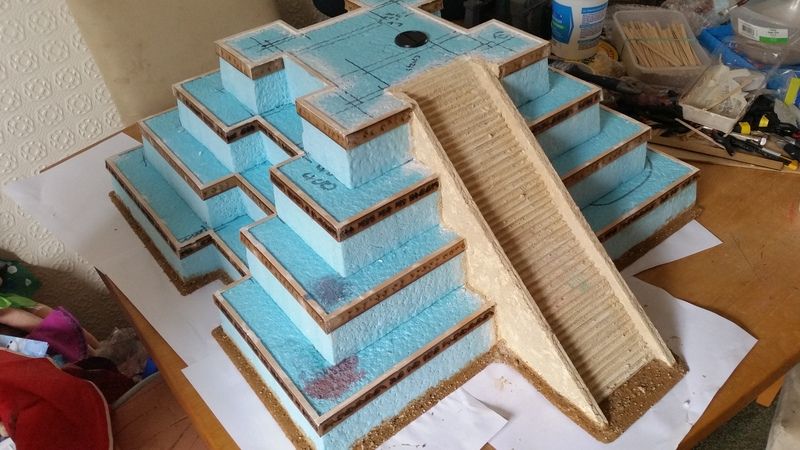
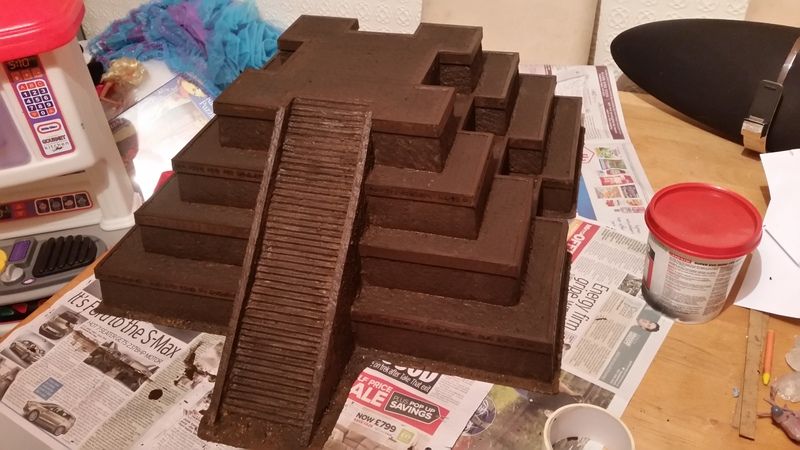
The installation of the steps was easier than I thought and after filling the quite shocking gaps with some filler it was time to get those laser etched strips out!
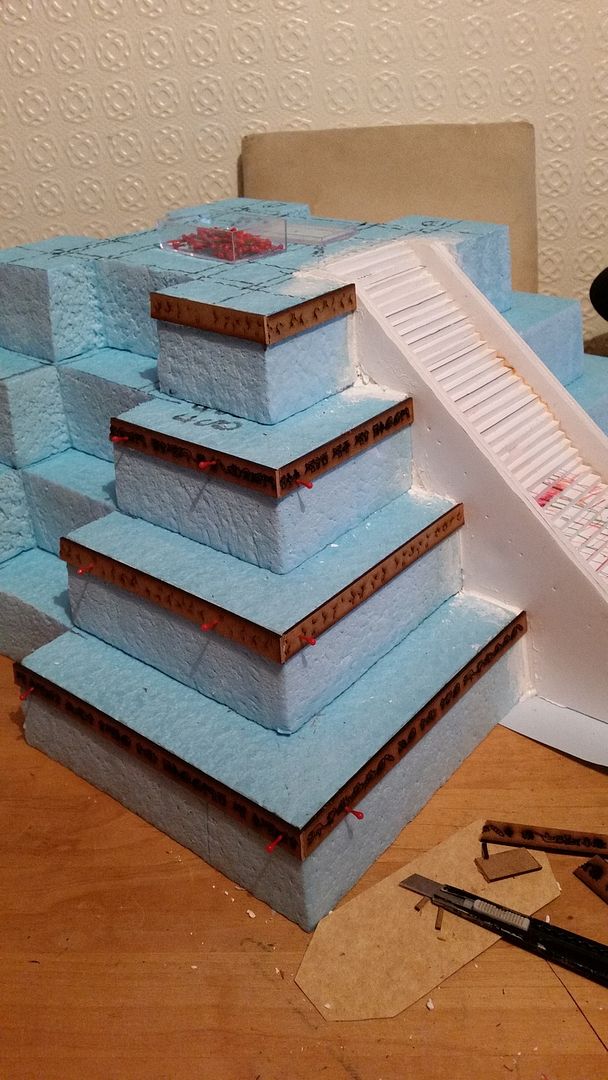
I had to hold the strips into place I drilled the mdf with a pin vice and then used dress pins whilst the PVA was drying, my top tip at this point would be to take out the pins after about an hour otherwise you'll need a pair of pliers to get the bloody things out!
so whilst cutting the strips to shape I had a few bits turn up from fenris games fenrisgames.com these are the same guys that I picked up the nodding donkeys up from a while back, only after I got these bits I decided that I needed more! So after a mooch on the website more stuff was on the way!
However I had a slight "technical" issue and I hadn't taken into account the cut in on the three sides when measuring the amount of strips that needed, but before Kris starts ripping the piss out of me I did the cut in's after I'd ordered the strips as I was going with the rule of cool!
I was short 6 lengths of Aztec writing and 2 predator writing, that's some mis-measure! and once more warbases came though and blasted some more over to me!
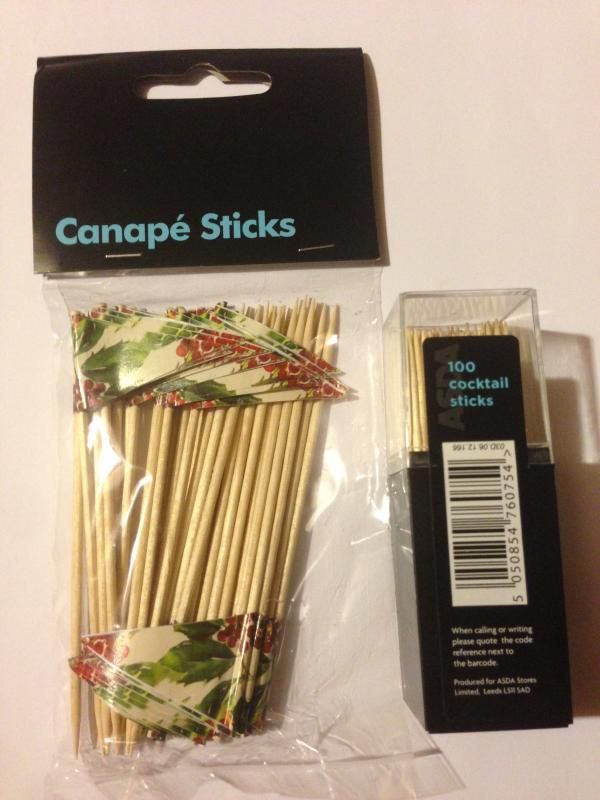
Once more after some feedback from various people I went on the rob and got a load of coffee stirrers and used these for the top of the steps to give it a edge.
I'd have to go back at a later time and use some filler to hide all the drilled holes for the pins though.
to get rid of the smooth surface of the foamboard again I took to the terrainaics facebook page and for cheapness and quickness a mis of pva, fine sand and water was applied to the whole of the staircase for a stone type effect, It can out really good and I was well chuffed with it as the build was finally approaching the paint stage,
I added a cork board base to give the piece a slight lip and to git it some additional strength,
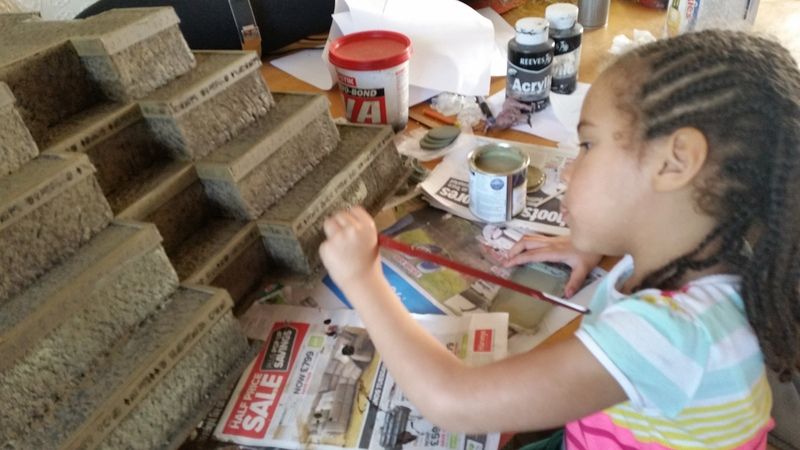
this was then given a sand finish and me and isla hit it hard like a pioneer breach team!
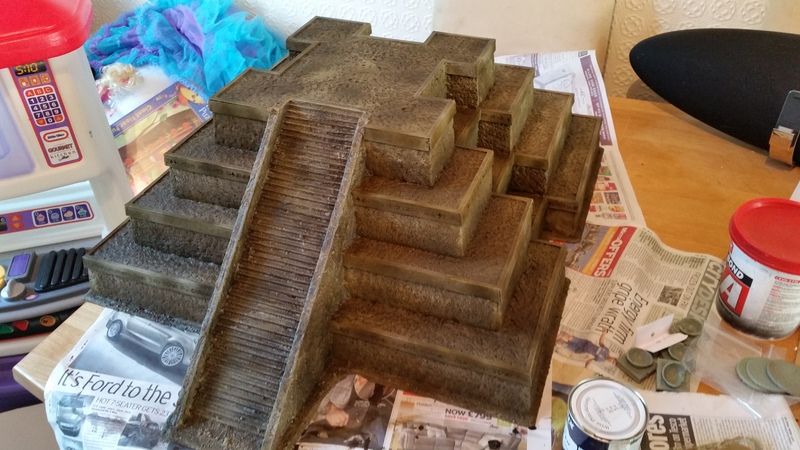
It took a couple of coats of the brown as the blue showed though slightly and you could see the lines that I'd drawn on the top level,

the first level of highlight went on, which was the colour match dulux english uniform and the additional bits from Fenris rocked up.
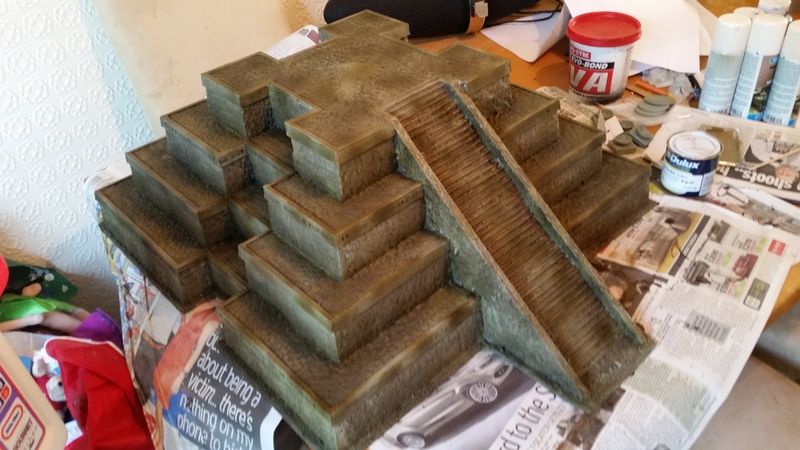
the final highlight then went on again with the superb assistance of the GC,

so the basic paint job was sorted, I needed to weather it a bit as it looked too bright and rather than wrestle with this and the airbrush I grabbed a couple of cans of model mates from my shelf and went for it,
the over all finished look was stop on,
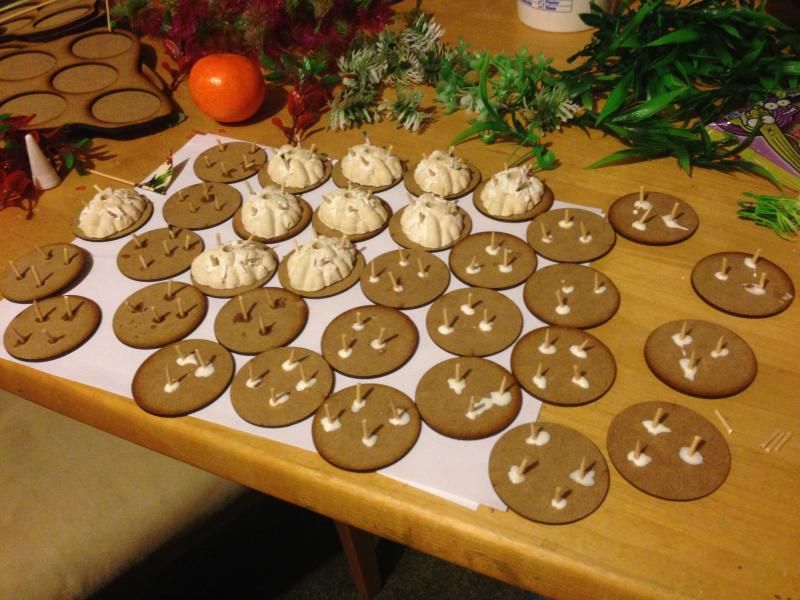
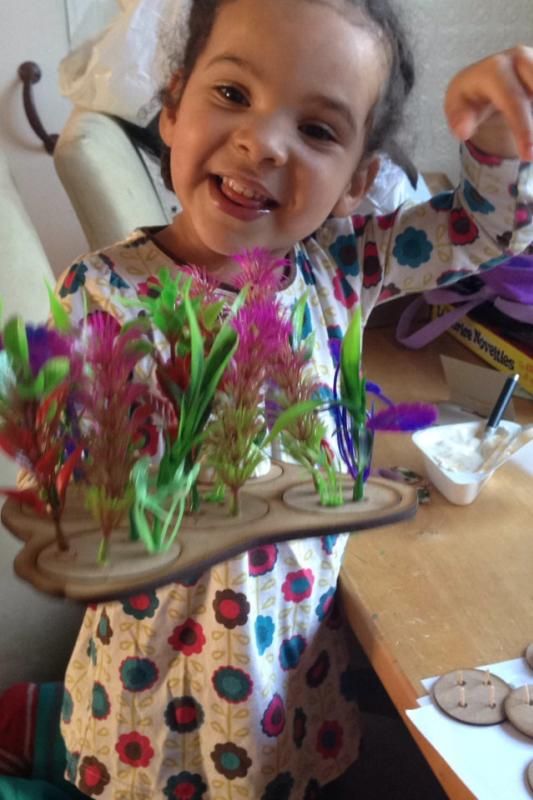
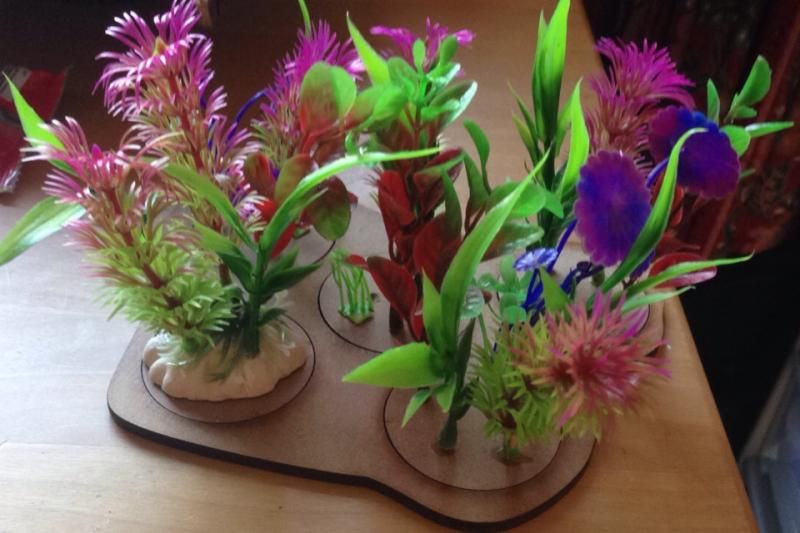
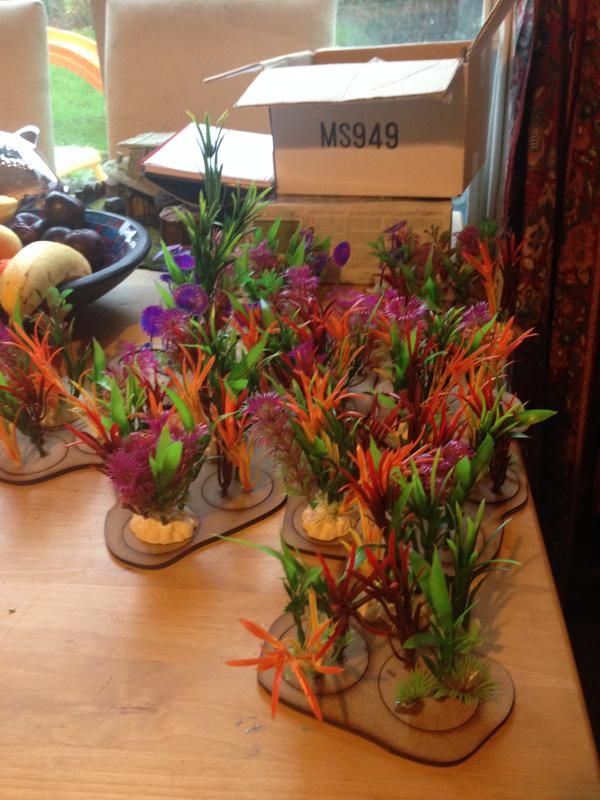
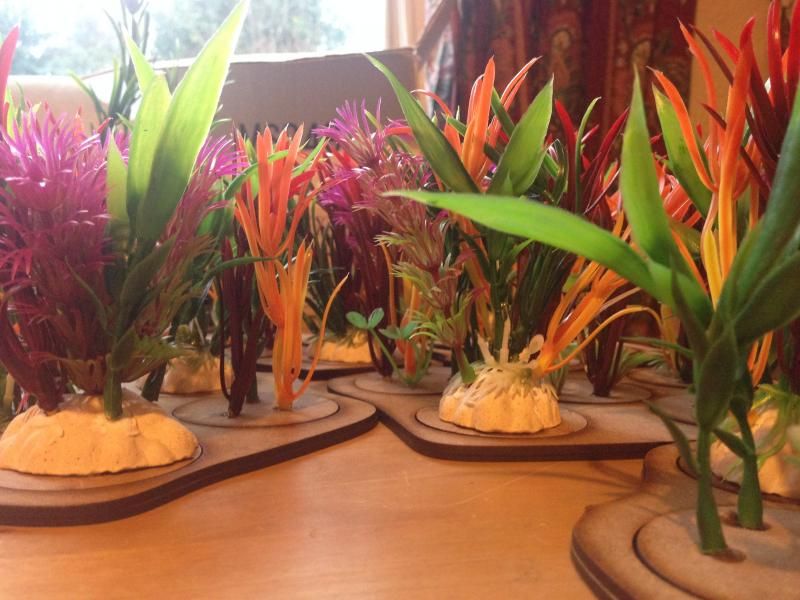
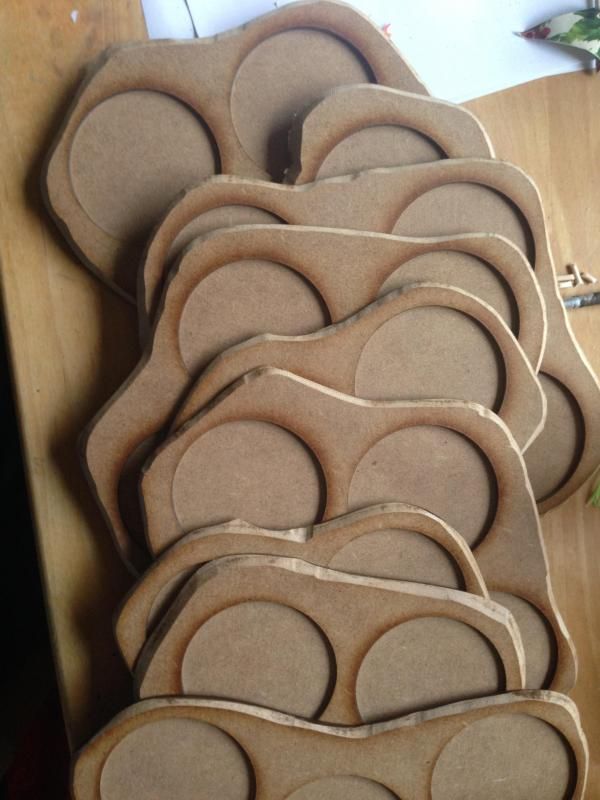
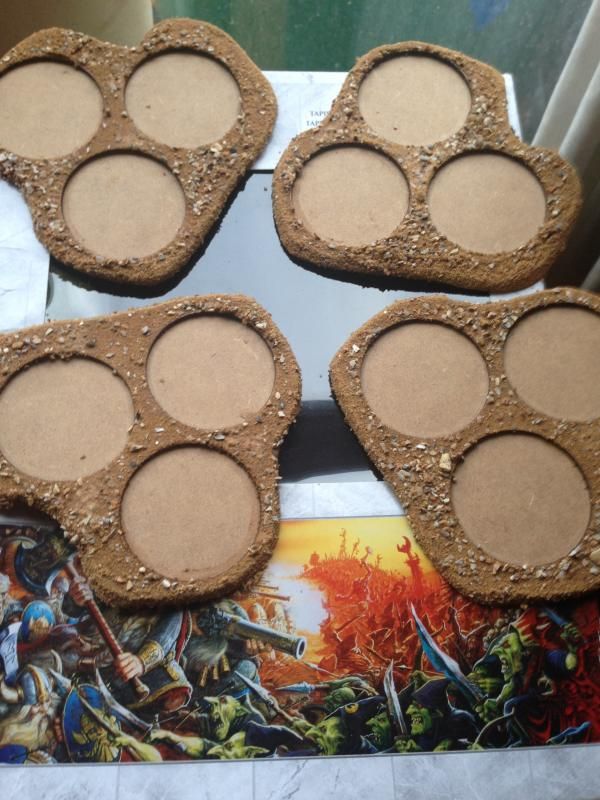
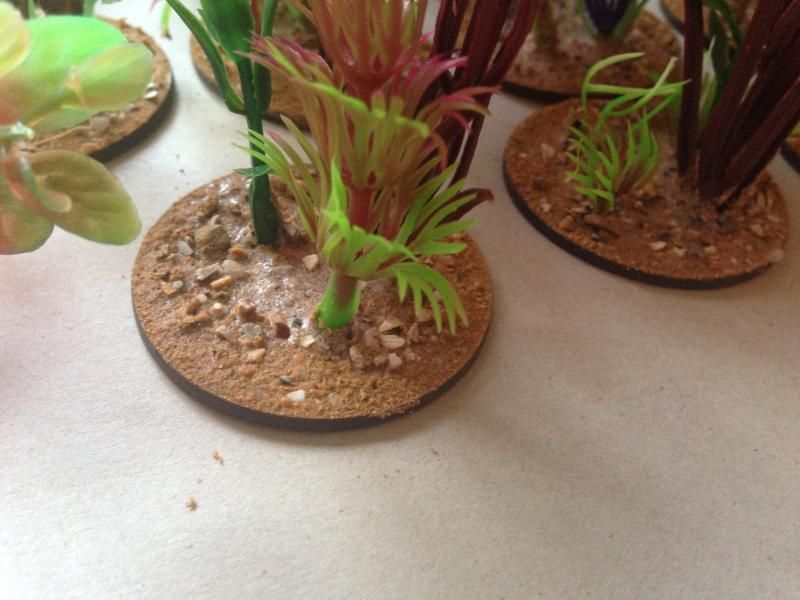
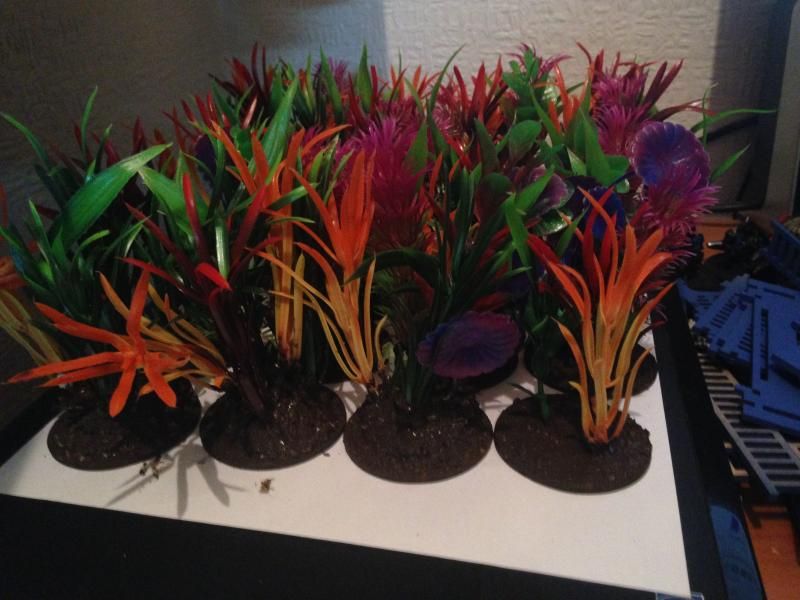
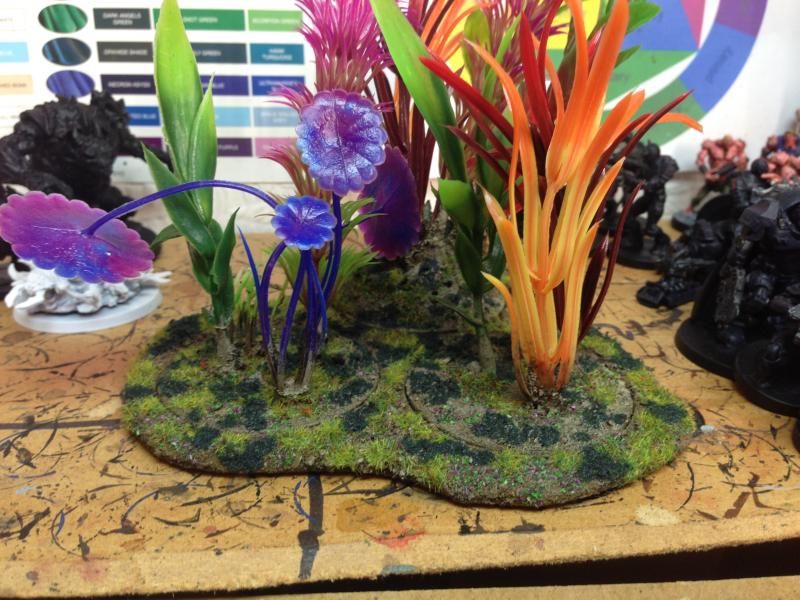
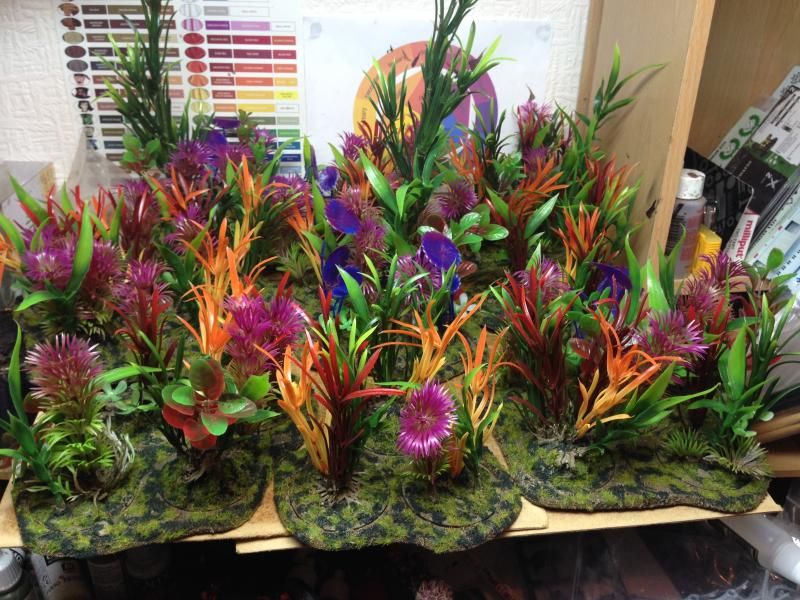
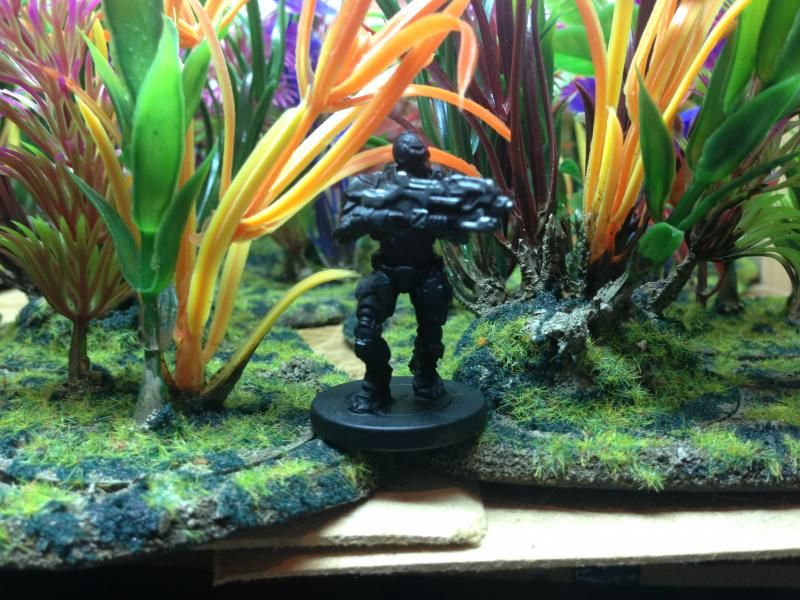
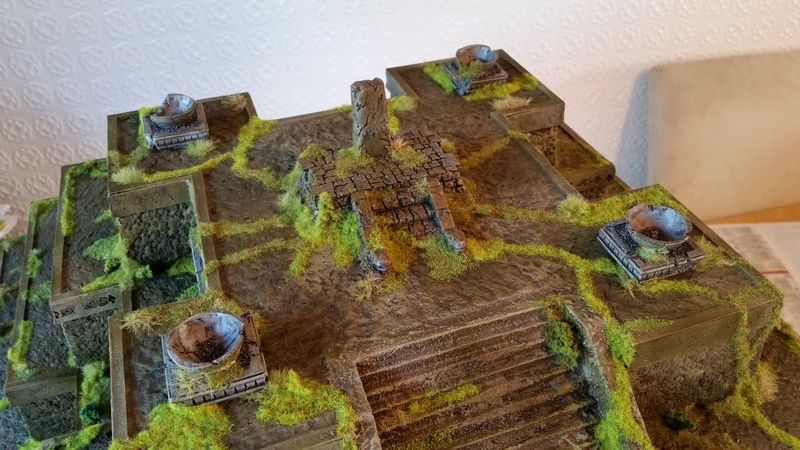
it was then time to jungle up the piece,
I used a mix of army painter battlefield tufts, and simply applied these with a dab of superglue, and then normal static grass summer and autum mix with pva and then finally old school normal flock for a moss like look, to give it a bit of depth I used some clump bushes and randomly stuck these and and that was that!
So now that badboy was sorted it was time to paint like a madman, so dual wielding paint brushes I set to work on the aliens,
I decided to take a break from the sea of blackness and actually set up the board for an overall feel,
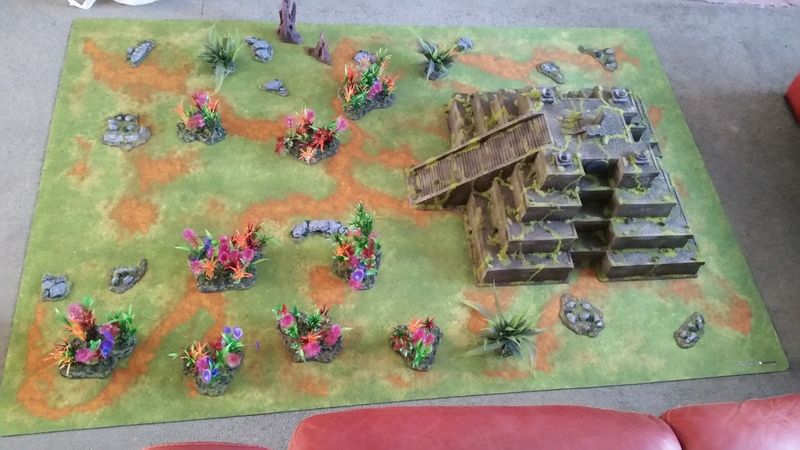
however I felt that the board needed something "else" so I grabbed the spare bits that I'd ordered from Fenris and did a quick shrine type piece,
so after a quick drybrush and some washes it was sorted,
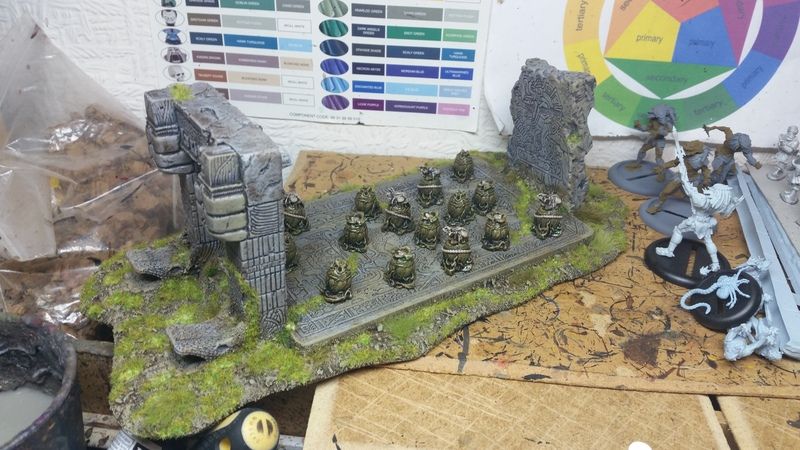
It'd be rude not to paint some eggs to populate the piece as well,

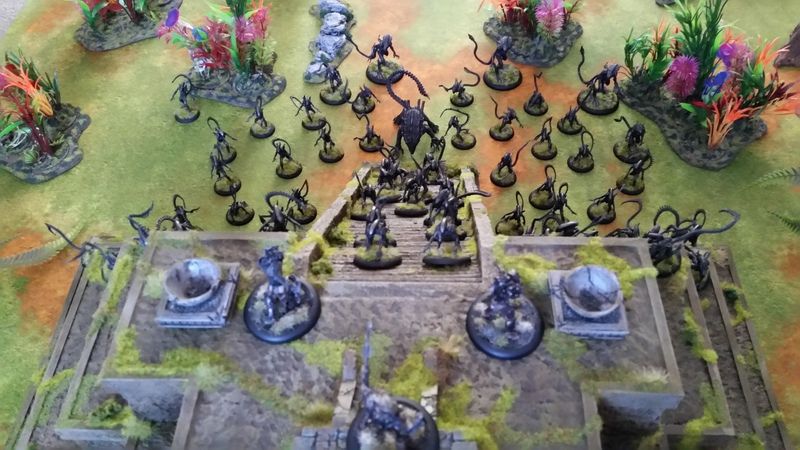
So as I'd been painting like a deamon I thought a group shot was in order,
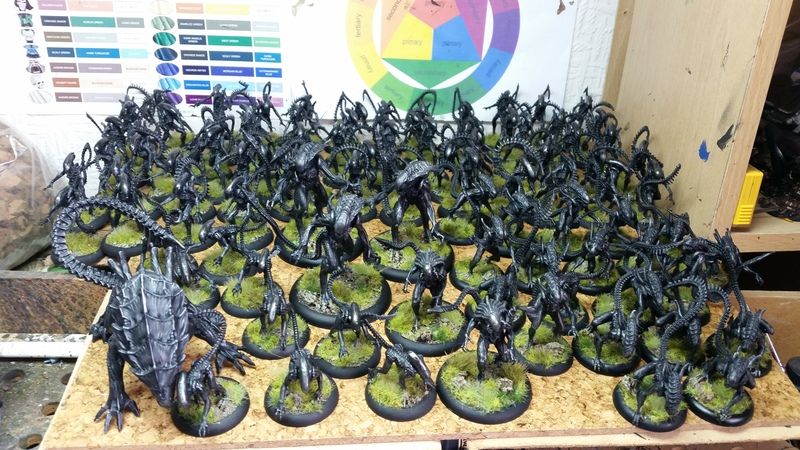
I hadn't realised how much I'd done, so I clocked in with 64 infants, 20 adults, 10 stalkers, 3 guards, 2 predaliens and 1 crusher!

To suss out some of the "artistic" rules I took the board down to the phat cats and needed a stick to keep the guys away!
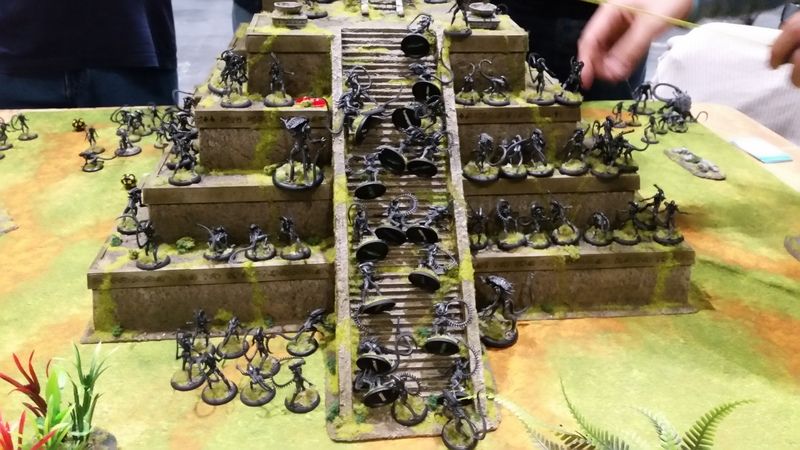
This was the only picture that I took of the board throughout the day, to say it was popular is an understatement and the amount of praise that it received throughout the day was brilliant as all the time and effort that had gone into this had definitely paid off!
High points for me during the day was getting to have a quick chat with Mel the terrain tutor and giving it his royal seal of approval along side the discussion of the text on the side which was entertaining, Meeting a chap who reads this blog and uses it for his own modelling which was really cool!
I managed a 45ish minute break and myself and Salma has a quick run around the place and stumbled across the terminator booth at warlord and the assemble a sprue challenge, so decided to have a crack,
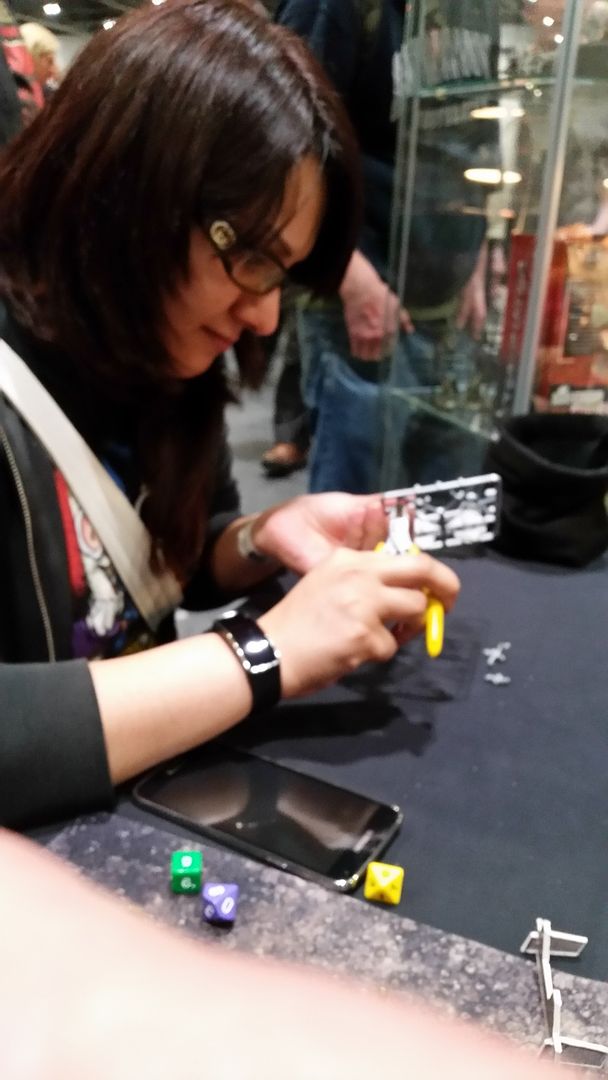
1:45 was no where near the fastest time of the day but Salma got free models out of it so not too bad!
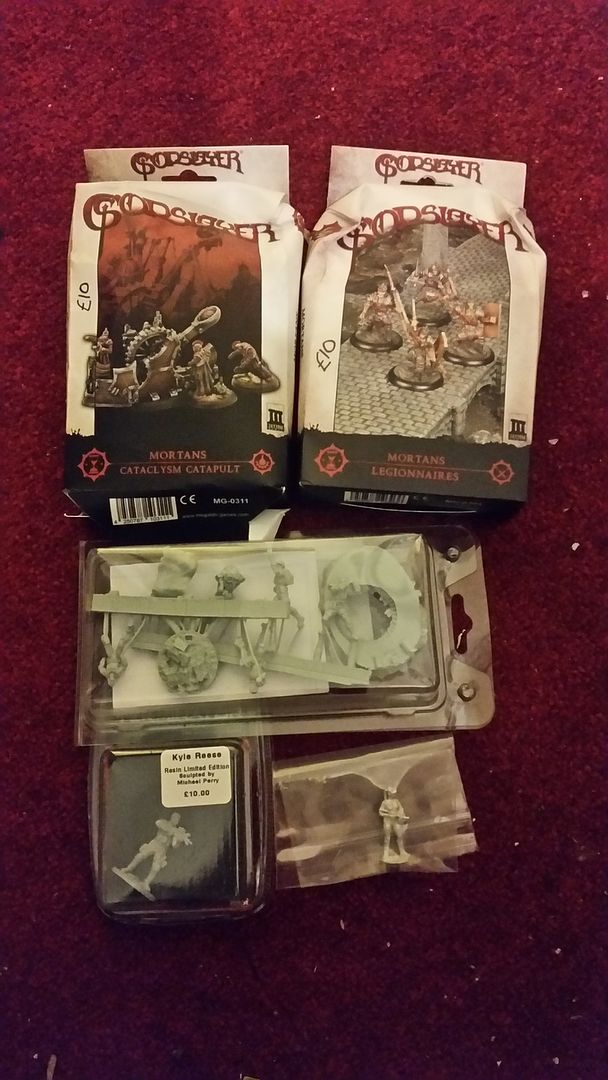
So actual "loot" from salute ironically people were shopping for me! so major thanks to Lee for getting the Kyle Reese resin model from warlord and the female operator from specture miniatures, Dave for going into the unwashed masses at troll trader and getting some godslayer bits crazy cheap!
I missed loads of the show this year due to how busy we were on the table, so next year I'm planning on going as a punter unless we get asked to something interesting....